

Learn how to start using eHopper POS with our video support

eHopper POS: Quick Getting Started Instructions
This video quickly shows you how to get started with eHopper POS, including setting up your company settings, store settings, inventory, and how to make a sale.

eHopper POS: Detailed Getting Started Instructions
This video shows you in detail how to get started with eHopper POS. It walks you through, step by step, how to set up your account, create inventory, and make a sale. It also shows you how to either use our product demo or get started right away.
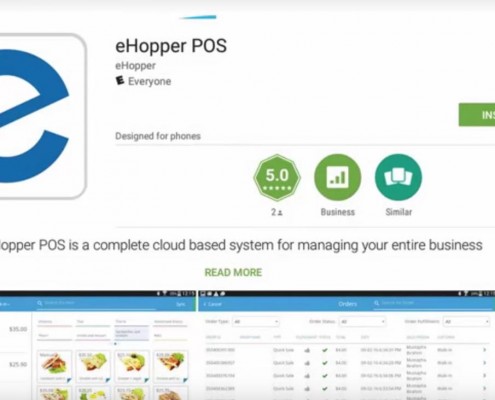
Downloading eHopper from Google Play
It takes just a few seconds to download eHopper POS from the Google Play. Once your download is complete, simply open eHopper POS with your Android tablet, activate your account, and log into the system. If you have not already created an account, visit our registration page to get started.

Registration
This video demonstrates how to register for eHopper POS, activating your new account, and then log into the system.
After filling in your contact information, you will receive an email with information on how to activate your new account. You will also recieve your login information, which includes your account ID, Back Office URL, license key, and your PIN #.
Once you enter your account ID and register license key, use your PIN# to access eHopper POS.

Logging In and Out
This video shows you how to log in and log out of both Back Office and POS on eHopper.
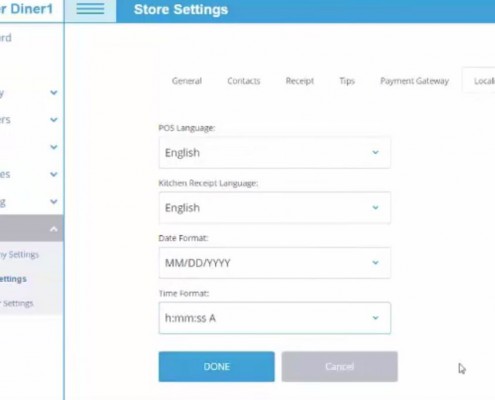
Account Settings
This video shows how to set up your account settings on eHopper POS, including setting up your company, store, and cash register.
Inventory Setup
In this video, you will learn how to set up inventory, including creating new departments and categories. eHopper Point of Sale breaks down inventory into three levels, Departments, Categories, and Products.
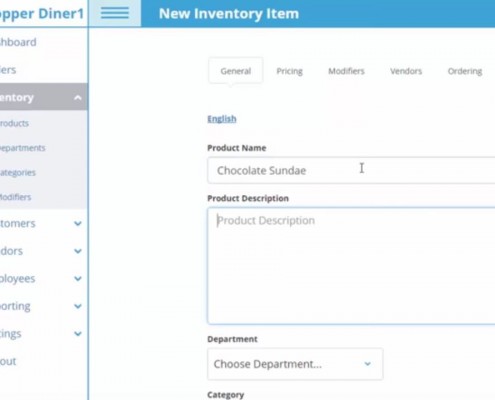
Once your categories and departments are in place, you can begin creating your products.
To do this, you must navigate through different item settings, including the product name and description, product image, price, units of measurement, and other essential information.

Employee Management
In this video we will cover setting up and managing your employees, including creating a new employee and setting employee roles and PIN numbers.
eHopper POS has a role hierarchy spanning from Administrator, to sales manager, down to Back office operator and sales person. Each role has its own designated responsibilities and restrictions.

Vendor Settings
You can easily manage any existing vendors or create a new one from the vendor list page. Creating a new one you can enter your vendors details including name, vendor type, tax ID, any notes, and contact information.

Ingredients Management
This video shows you how to create and manage ingredients and assign them to your products on eHopper POS.

Synchronization
In this video we will learn how to use eHoppers pos synchronization feature.
In eHopper point of sale synchronizing has one main purpose, which is to synchronize your back office data with your application or front office.

Opening and Closing Register
This video shows you how to open and close your register on eHopper POS so you can start processing sales for your business.

Processing Cash Payments
This video shows you how to process cash payments for your business on eHopper POS.

Saving and Reopening Orders
This video shows you how to save and reopen orders on eHopper POS quickly and efficiently so that you can access and make changes to them at any time.

Refunding and Voiding Orders
This video demonstrate how to void or cancel a paid order, a few ways to refund paid orders, and how to do a manual cash refund.
These features will make your business more comfortable and help avoid mistakes using eHopper pos system.

Adding Notes
This video shows you how to easily add line-item and order notes to your receipts on eHopper POS.

Applying Discounts
In this video, you will learn how to apply individual line-item discounts and discounts for entire orders on eHopper POS.

Back Office
With the eHopper Point of Sale System Back Office dashboard, you can view a variety of sales data, including total transactions and sales. eHopper’s inventory management is organized into three levels: department, category, and products.
Within an inventory item, you can customize product name, create a description, apply prices, adjust quantity and add modifier groups.

Placing an Order
It only takes a few seconds to create an order with the eHopper Point of Sale System.
Sale types such as dine in, take out, deliver or quick sale can be selected, and new or existing customers can be added to an order.
During item selection you can choose available modifiers, such as created groups, add-ons or exceptions. It’s possible to adjust quantity, add notes, apply discounts or add more items before the order is saved or processed.

Processing Payments
Processing a payment with eHopper POS Software:
You can easily process different types of payments with the eHopper Point of Sale System, such as cash, credit, debit, EMV, contactless Samsung Pay or Apple Pay.
There are options to re-print receipts instantly or email them.
It’s also possible to choose a split payment to divide payment between a number of customers with different credit cards and cash payment options.

Cash Discounts Program
In this video, you will learn how to set up the Cash Discounts program on eHopper POS to save money on credit card processing fees.

eHopper POS Quick Service Restaurant Demo
In this video, you will learn how to utilize the eHopper POS Freedom Package for your quick service restaurant, in order to maximize profits and grow your business.