
How to Setup eHopper POS on Windows PC
eHopper offers a complete POS solution for small business that is easy to use, cross-platform, and available on multiple devices. But did you know you can also run eHopper POS on your existing Windows based device? This quick guide will show you just how easy it is to start your windows POS setup.
Requirements for POS Usage on Windows PC
For best performance of the eHopper Windows app, please ensure your PC is on one of the following operating systems:
- Windows Vista
- Windows 8
- Windows 10
Installing the eHopper POS Windows App
1. Install the eHopper app for Windows by clicking here and then selecting the Download link.
2. Open the download by clicking on it at the bottom of your screen.

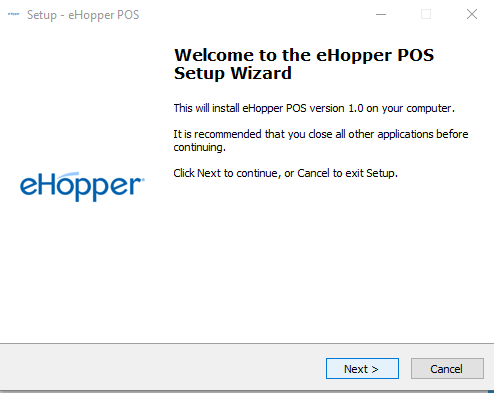
3. Click Yes on the popup that appears, followed by Next on the eHopper POS Setup Wizard screen.
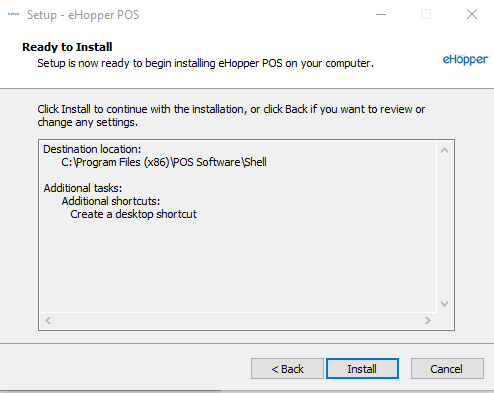
4. Select the destination location for the app and then click Yes, followed by Next on the following screen.
5. Click the Install button.
6. Once the app is installed, click Finish.
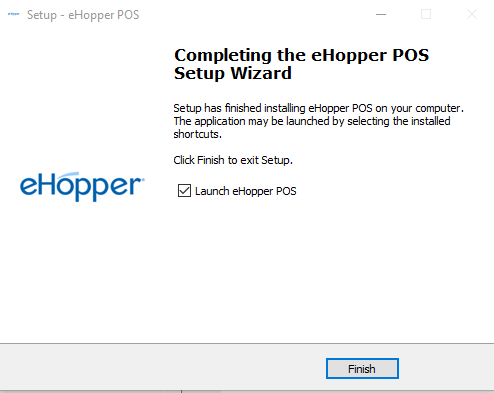
7. The eHopper app will then appear as an icon on your Windows PC. Click on the icon to open the app, which can now be accessed at any time.
![]()
Logging In to eHopper App for Windows
1. On the login screen, input your Account ID and License Key and click the Activate button.
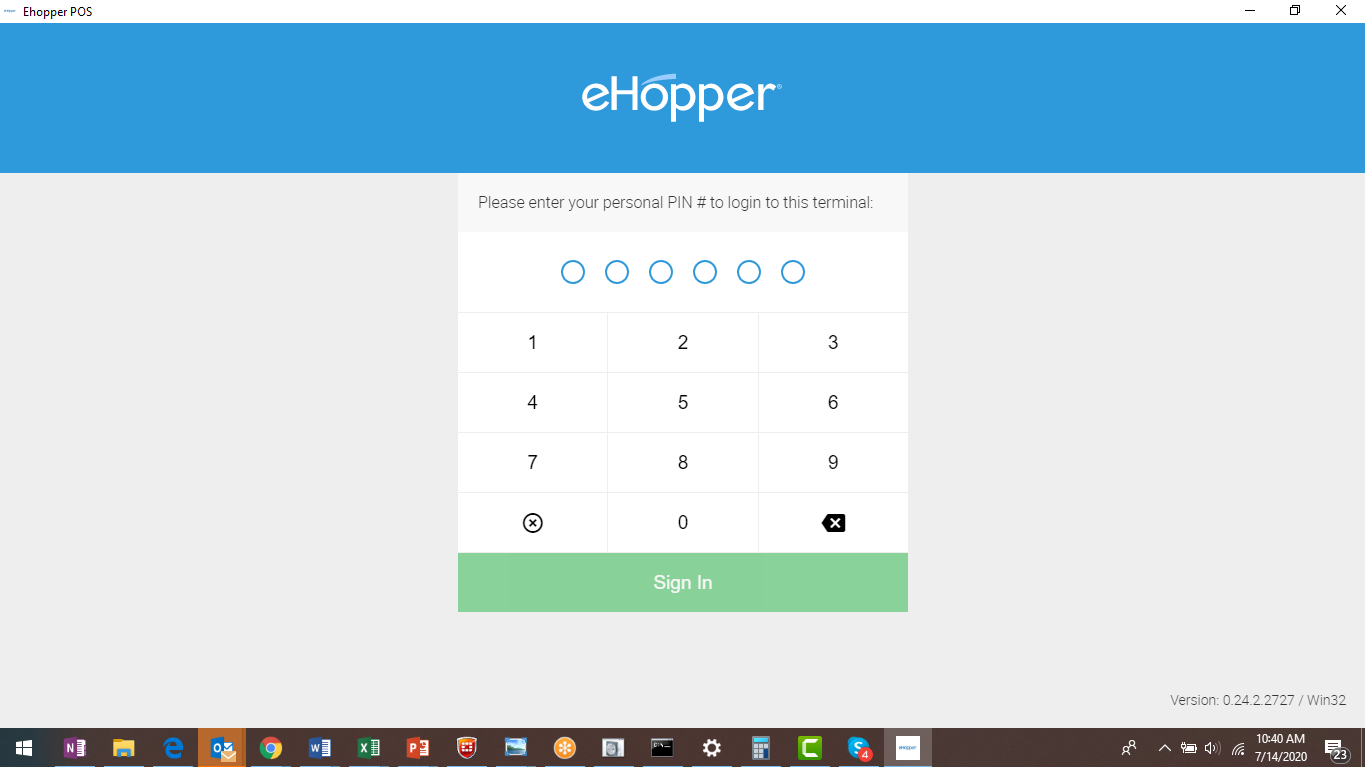
2. On the next screen, enter your 6 digit PIN #.
3. Agree to the Terms and Conditions.
4. After the initial synchronization is complete, you will be able to utilize the Windows app.
Receipt Printer Setup on eHopper POS App for Windows
Installing Printer Drivers
In order for your receipt printer to work with the Windows app, the first step is to install the printer’s driver.
The below printers are certified to work with the eHopper POS Windows app. We will highlight below how to download drivers for each.
- Star Micronics TSP143LAN Ethernet Receipt Printer
- Star Micronics TSP654IIBI Bluetooth Printer
- eHopper BTP-R180II Thermal Printer
Star Micronics TSP143LAN Ethernet Receipt Printer
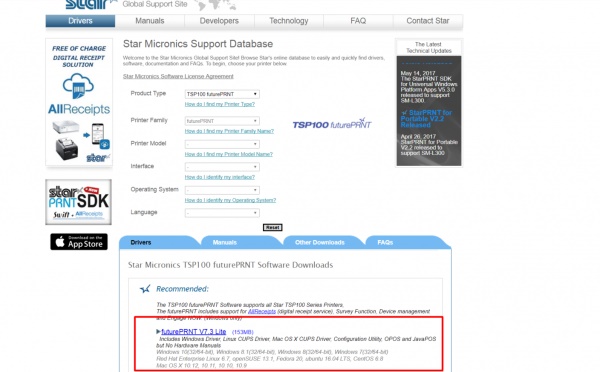
1. Open this link: http://www.starmicronics.com/support/default.aspx?printerCode=futurePRNT
2. Select futurePRNT V7.3 Lite on the bottom of the screen.
TSP143LAN Ethernet Printer driver install
3. The download will appear on the bottom of your screen. Click on it once the download is complete.
Printer drive installation
Star Micronics TSP654IIBI Bluetooth Printer
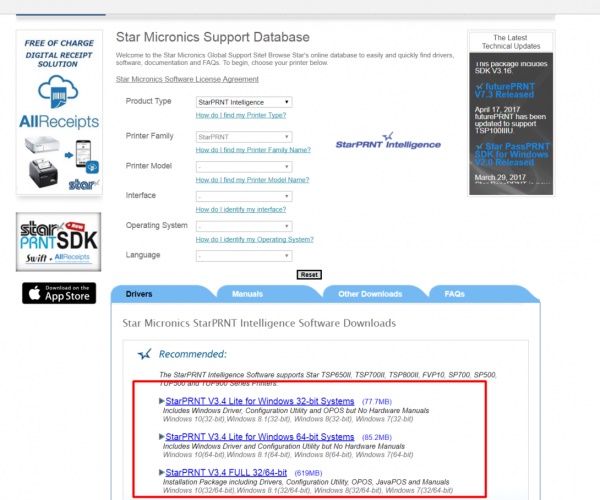
1. Click on this link: http://www.starmicronics.com/support/default.aspx?printerCode=StarPRNT
2. Select one of the downloads on the bottom of the screen.
Star Mircornics TSP654IIBI
3. The download will appear on the bottom of your screen. Click on it once the download is complete.
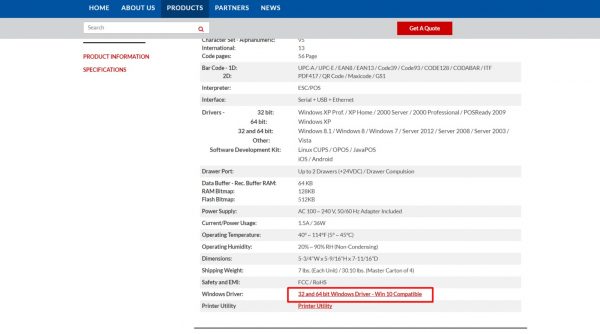
eHopper BTP-R180II Thermal Printer
1. Click on this link: https://www.crs-usa.com/products/printers/snbc-btp-r180ii-thermal-receipt-printer-series- 2. Scroll down and select 32 and 64 bit Windows Driver – Win 10 Compatible.
eHopper BTP-R180II printer driver installation
3. Select the download that appears on the bottom of your screen.
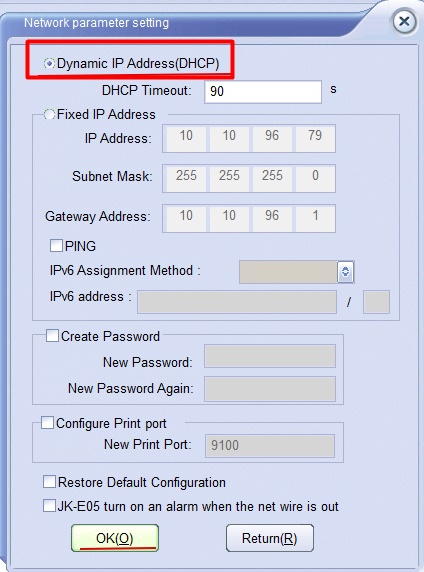
4. During the download process, there will be a field to enter the IP address of the printer. To find the current IP, hold down the Feed and Power On buttons on your BTP printer simultaneously until a page prints. On the bottom of this page, you will find your printer’s current IP address. Enter it into the field.
Configuring Printers
Once you install the printer drivers, but before you can use POS receipt printers with Windows, you have to configure them to your device. To do this, simply follow the steps below for each type:
Ethernet/LAN Printers
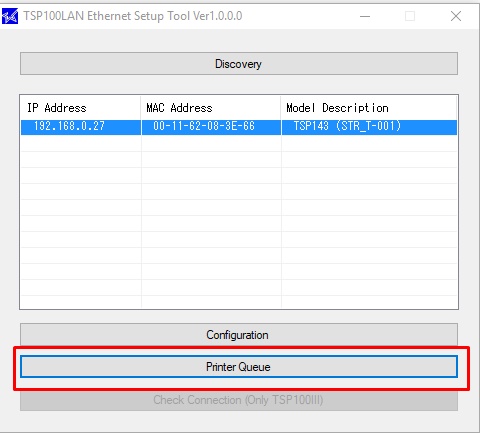
Star TSP100:
- Run either the Ethernet Setup Tool or LAN & Bluetooth Setup Tool on your device.
- When it finds the connected network printers, click the Printer Queue button.
Printer queue setup
- Click Yes in the pop up that appears.
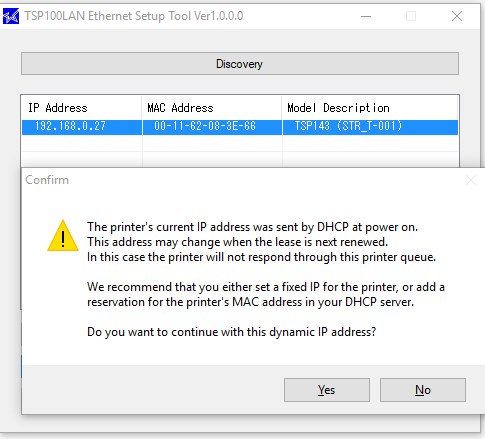
Dynamic IP Address
- Make sure the Default Printer box is checked and optionally click on Print Test Page to ensure your device recognizes the printer.
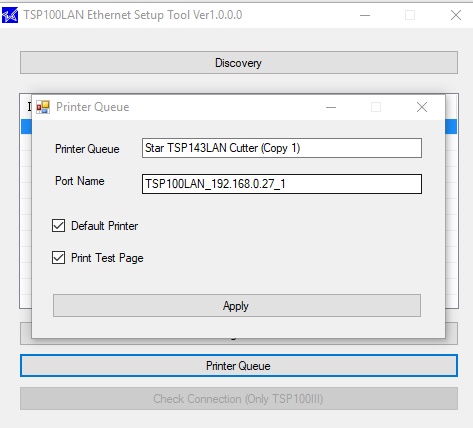
Print test page
- Click the Apply button.
eHopper BTP-R180II Printer
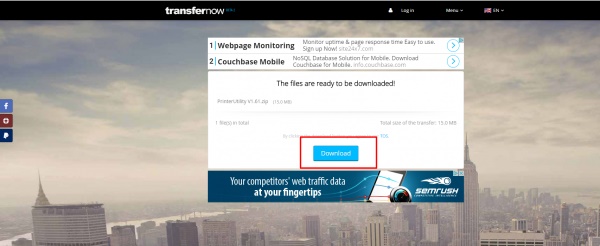
1. Download Printer Utility by clicking on the following link: https://www.transfernow.net/download/?utm_source=44d8j131vm7n# http://dropmefiles.com/rkj9u and then selecting the Download button.
2. Open the file that appears on the bottom of the screen.
BTP-R180II Printer
3. Extract the Printer Utility Zip file (by right clicking and selecting Extract to….) and then select the unzipped folder that was created.
4. Select Utility.exe.
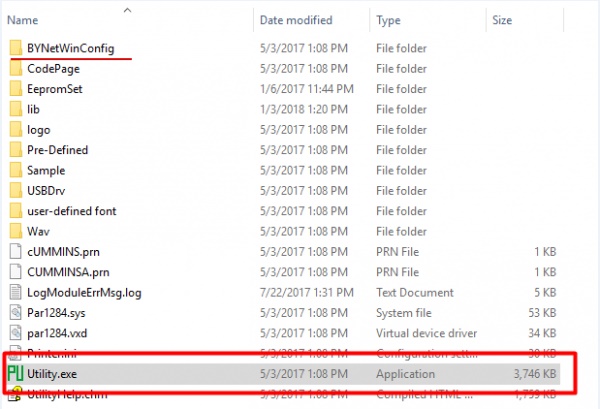
Printing Utility
If Utility.exe does not appear, it is possible the file may be hidden by Windows MS firewall.
In this case, please follow the following instructions: https://portal.ehopper.com/portal/en/kb/articles/enabling-windows-ms-firewall-permission-for-utility-exe-file
If you have Antivirus on your PC and it is blocking the program, please add the Utility.exe file to the exceptions list.
5. Once Printer Utility opens, select Port Set.

5. Select BTP-R180ll from the Printer Name drop-down, Ethernet from the Port type drop-down, and then select Auto get IP as the Net Setting (default IP will be 192.168.1.251).
6. Click OK when done.

Ethernet Port Type
If a warning message appears, close it and proceed.
7. Run BYNetWinConfig.exe on your PC.

Select Search Printers(S).
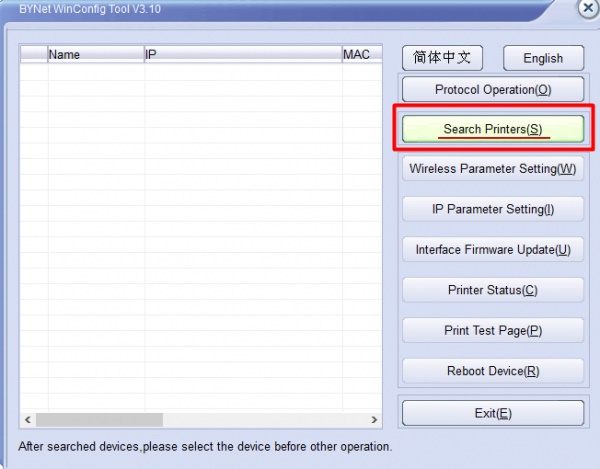
Search Printers
8. Select the printer that was found.
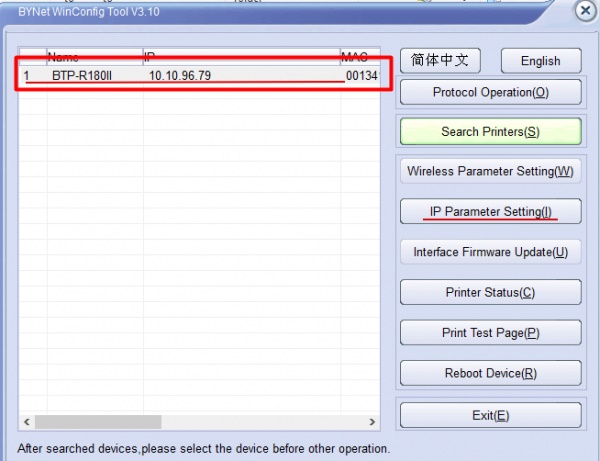
9. Click on IP Parameter Setting(l).
10. Click on Reboot Device.
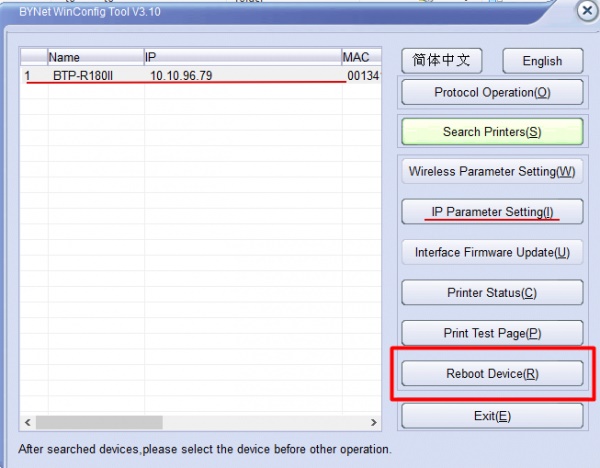
Reboot Device
12. Click on Search Printers again. The printer’s Name & new IP will be appear.
Star Micronics Bluetooth Printer
- Search for Bluetooth Settings on the printer and select the printer to pair it with your Windows device.
- Run Star Micronics Portable Printer Utility on your Windows device and follow the instructions to add the printer.
- Make sure the test print command works to ensure the Bluetooth connection is working properly.
- Add the printer to the Windows Printer Queue (Utility Functions -> Windows Printer Queue Management)
Setting Up Printers on eHopper POS App for Windows
1. Open the eHopper app on your Windows device and log in to your account.
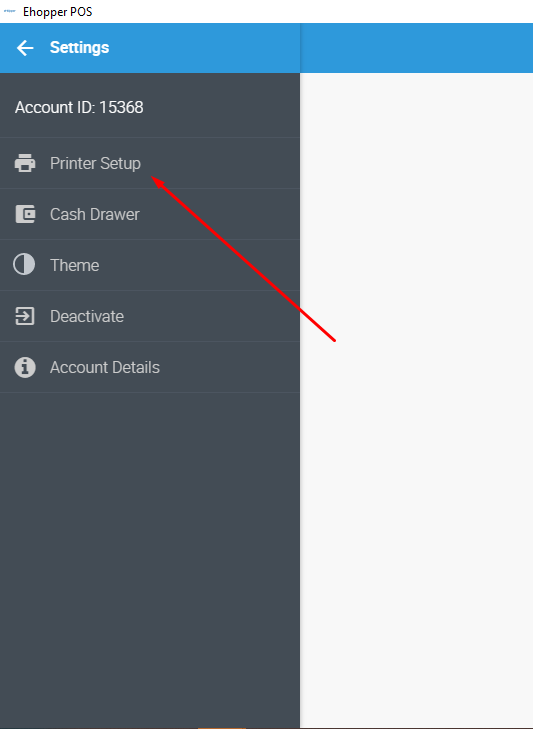
2. Open the left navigation menu and click Settings, followed by Printer Setup
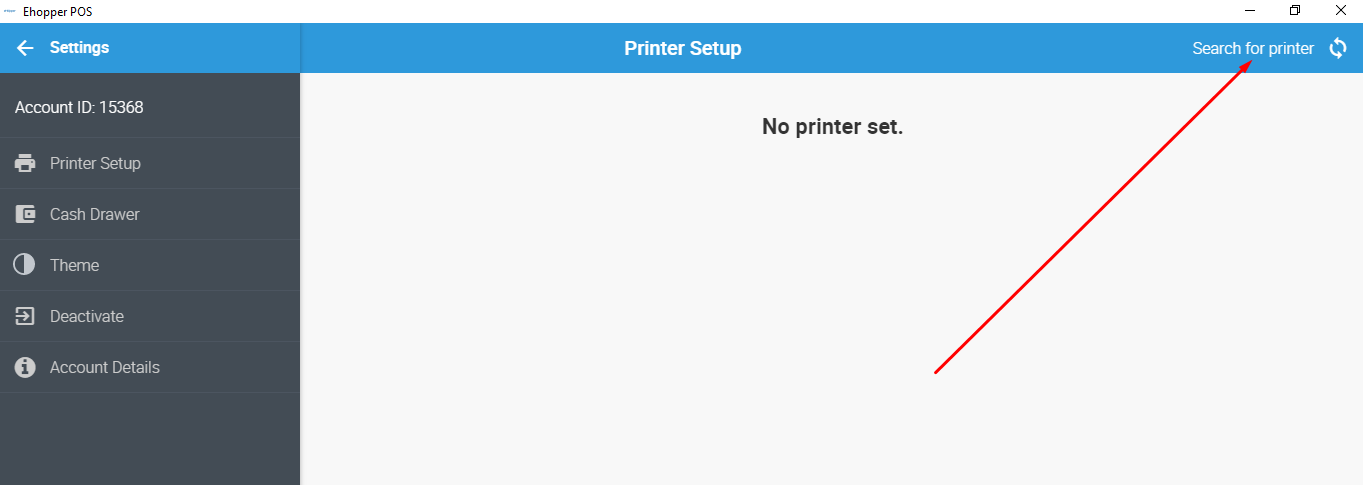
6. Click Search for printer on the top right of the screen.
7. All printers you installed drivers for on the device should appear under both Receipt Printers and Kitchen Printers. Select the checkbox to the right of each printer that you would like to print receipts from.
8. Choose either 80mm or 58mm as the paper width for both printer types.
9. Click Print test page and see if something prints to ensure the printer is working properly.
10. Click the DONE button.
• You will now be able to use the selected receipt/kitchen printers to print receipts through the eHopper Windows app.
Setting Up Cash Drawer on eHopper POS App for Windows
1. Open the eHopper app on your Windows device and log in to your account.
2. Open the left menu and click Settings, followed by Cash Drawer
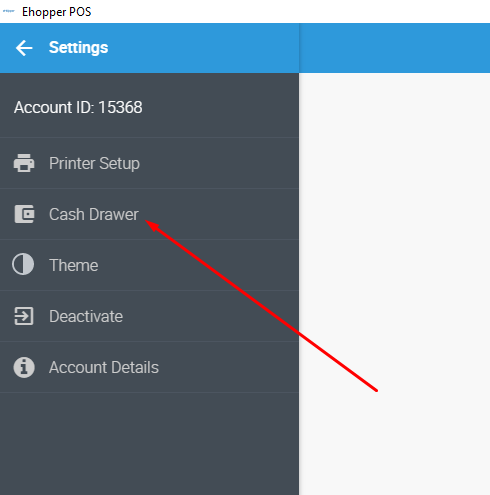
3. Click Search for cash drawer on the top right of the screen.
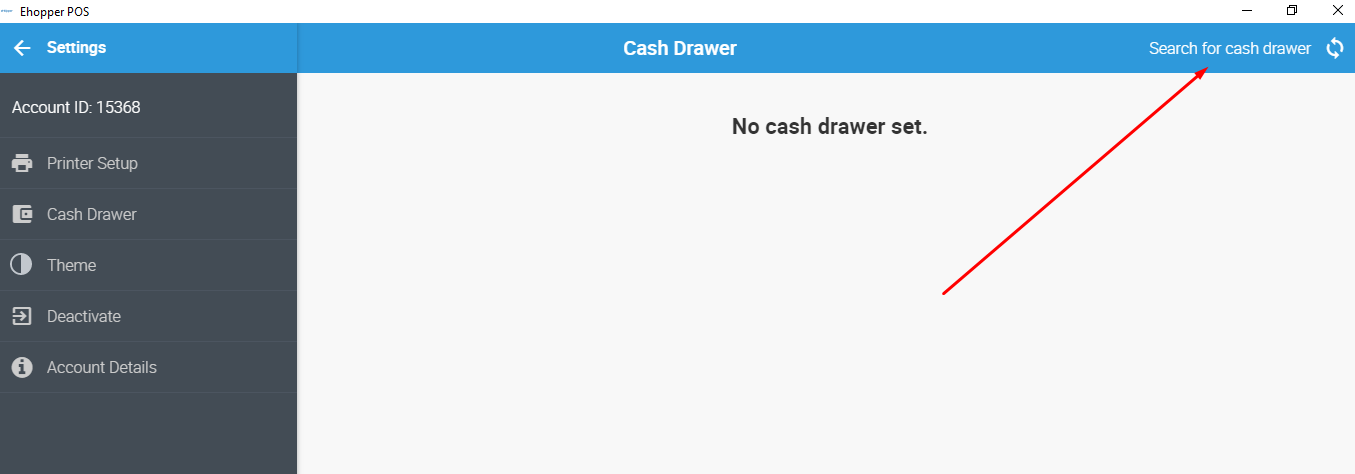
6. In the list that appears, select the checkbox next to the printer that your cash drawer is connected to.
7. Tap Test. If the drawer opens, it is working properly.
8. Tap the DONE button to save settings.
9. The drawer should now open upon each transaction.
Terminal Setup on eHopper POS Windows App
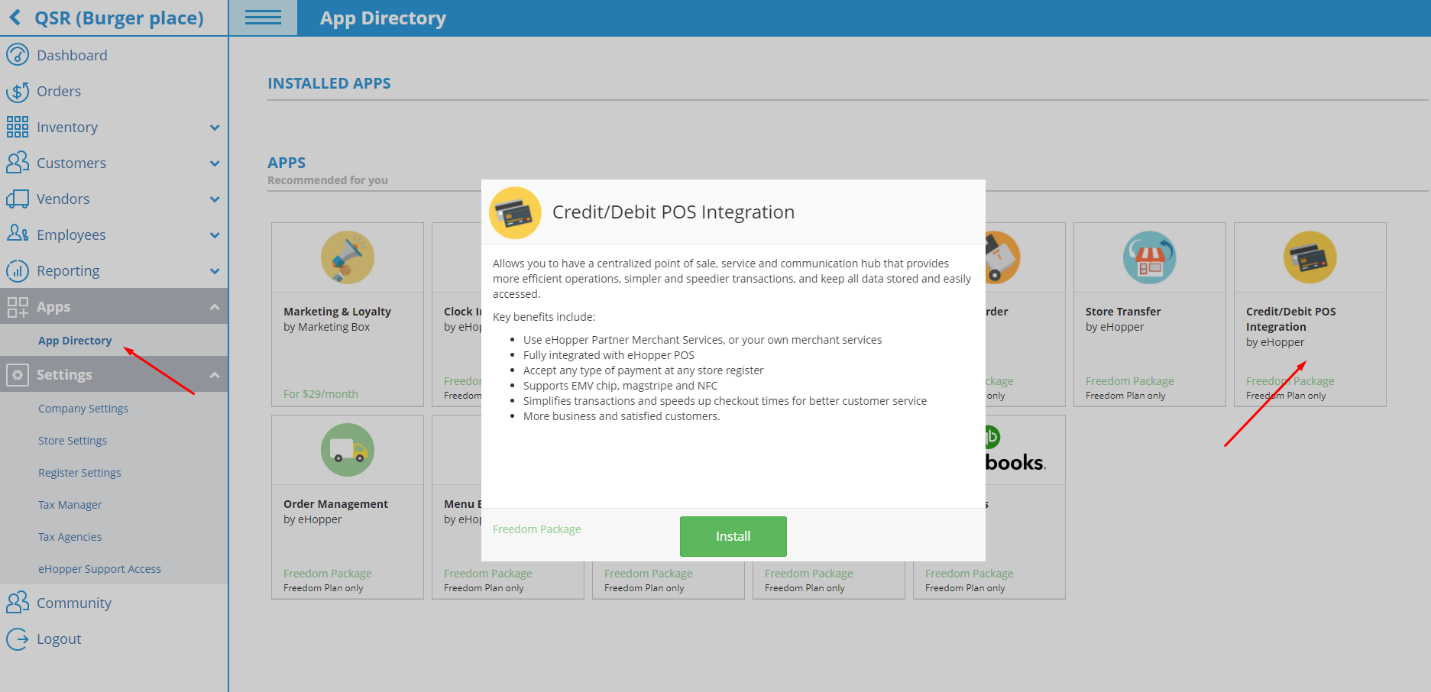
1. In order to use a terminal with the eHopper Windows app, you will need to first log in to Back Office at bo.ehopper.com, and then go to Settings—>Apps—>App Directory. From there, install the Credit/Debit POS integration App.
2. In the left menu, go to Settings—>Store Settings.
3. Click on the Payment Gateway tab on the top of the screen and then select the terminal you will be using from the Payment Gateway drop-down field.
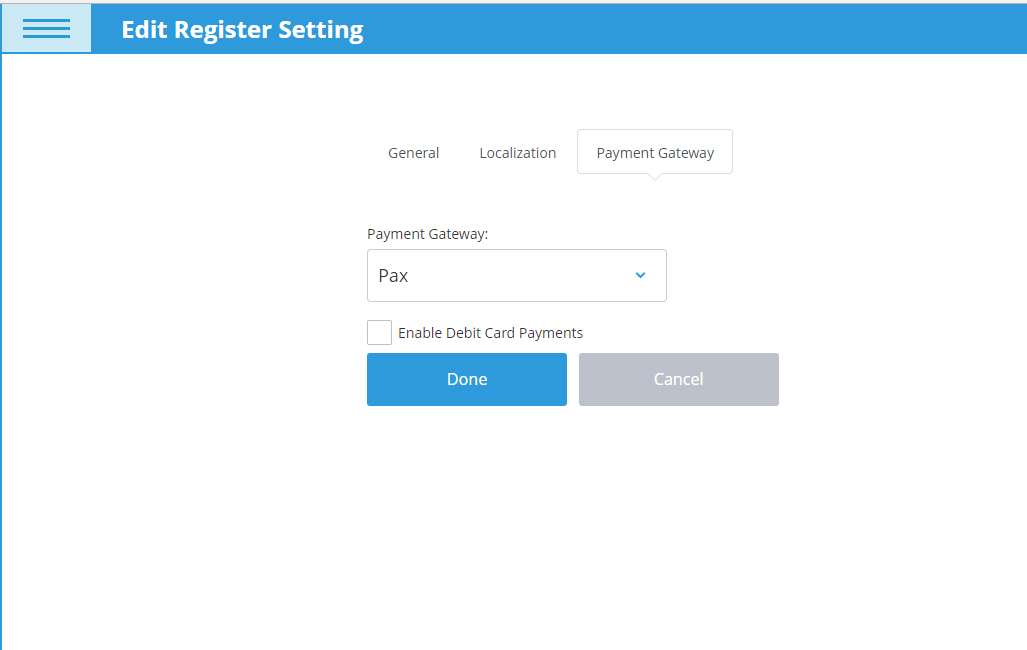
4. Click on the Done button to save changes.
5. Login to POS and from the left menu, go to Settings—>Terminal Setup.
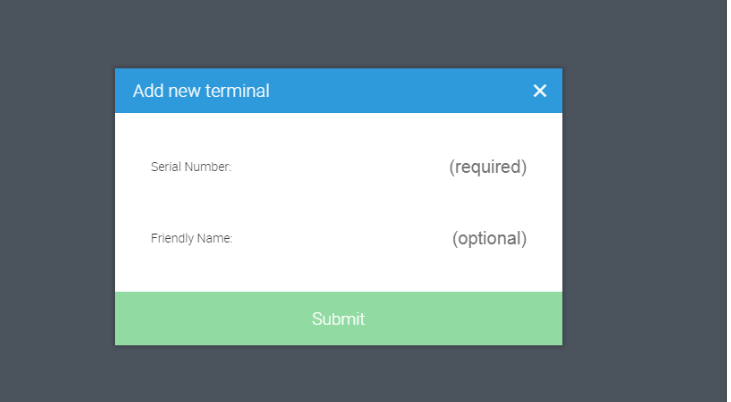
6. Click the green Add Terminal button.
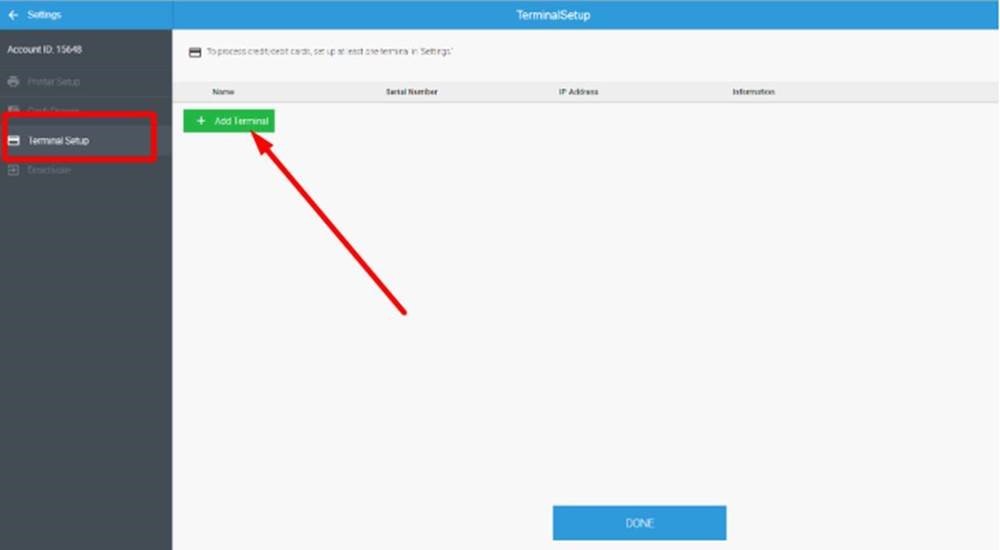
7. Enter the Serial Number of your terminal and then click Submit.
8. Click the Done button on the Terminal Setup screen.
Socket Mobile 7Ci Scanner Setup on Windows Device
Note: Other scanners may work on your Windows device. You can test by scanning a barcode or serial number in an Excel sheet. If it works, it should work with eHopper.
1. Turn the scanner on by pressing and holding the small power button until the LED turns blue and it beeps twice (it will beep low and then high).
2. To enable SPP mode on your Windows device, scan the barcode below.

If you are using a different scanner, SPP mode may not work, however, you should still be able to scan barcodes after clicking in the search bar in POS.
3. Search for Bluetooth settings on device.
4. Select the Socket Mobile scanner under the available Bluetooth devices (it should say Ready to pair) and then click the Pair button that appears.
5. Add a barcode to a product by logging in to your eHopper Back Office account and then navigating to Inventory—>Products, selecting the product, and entering the product’s UPC code in the UPC field.
6. Log in to POS and synchronize your data.
7. Scan the barcode of the product that you added a UPC code for and the product should automatically appear in the shopping cart, with the barcode appearing in the Search for product field.
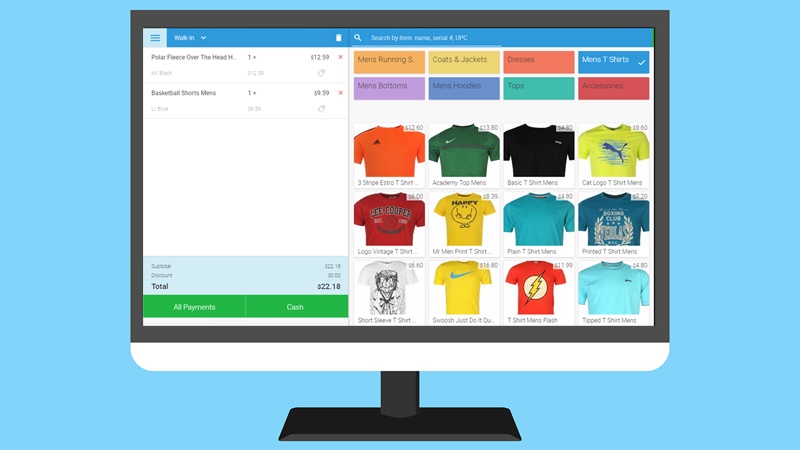
PC POS System
You’ll all set! That’s the end of your POS setup. Your PC POS System (and you) are now open for business.
Want to take your POS setup to the next level? Try all the powerful features of eHopper’s free POS solution today.


Leave a Reply
Want to join the discussion?Feel free to contribute!