How to use eHopper Pay Later Feature to Manage Layaways, Deposits, and Invoices
Did you know that you can use eHopper point of sale not only to process payments but to support operations such as layaways, deposits, and invoices/quotes?
This can be done in eHopper through the Pay More Later (or partial payment) feature, which allows your customers to pay partially for an order at one time and pay the remaining balance at a later date, providing them with increased flexibility and options and an overall better customer experience.
In this guide, we will outline how to use this feature to perform layaways, deposits, and invoicing at your business. Before using the Pay More Later feature for these purposes, please ensure that it works for your specific operations.
Requirements
In order to utilize the Pay More Later feature for layaways, deposits, or invoicing, the following must be set up in your eHopper account:
• You should have a working eHopper account set up on either your Windows PC, Android, iPad, or Poynt terminal. For instructions on how to set up eHopper on each of these devices, please see https://ehopper.com/how-to-activate-ehopper-pos/
• You should be assigned either an Administrator, Sales Manager, or Salesperson employee role.
• If you have a Freedom/Restaurant/OmniChannel account, you can use credit cards as an option for layaways, deposits, or invoicing once you have installed the Credit/Debit POS Integration app, properly configured your terminal, and set up the terminal within the POS. For more details on this, please see https://portal.ehopper.com/portal/en/kb/articles/credit-card-payments
How to Use Layaways in eHopper
1. Add the items to the cart that the customer will be paying for in payment installments.
2. Choose the green All Payments button and then select Split Payment as the payment method.
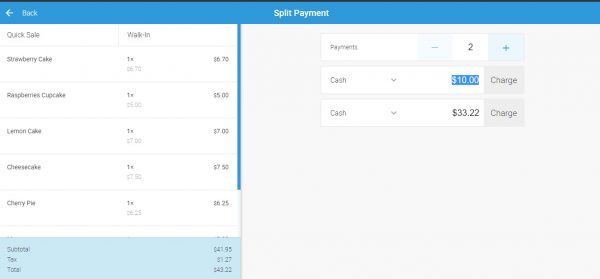
3. On the Split Payments screen, the order amount will be split evenly two ways by default. Decide how much of the order total you would like the customer to pay now in the initial layaway payment, tap on the amount in one of the payments, and then manually enter what the amount for the initial payment in the layaway will be. The rest of the order amount will be shifted to the other payments in the split.
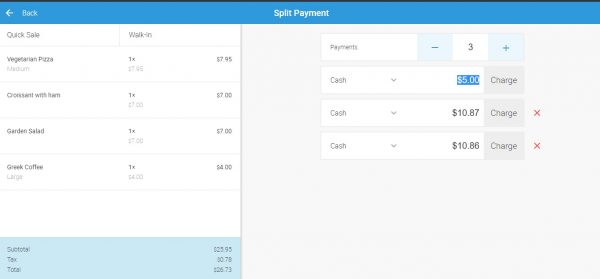
4. Select the payment type that is preferred for the initial payment by tapping the down arrow on each row and then selecting the payment option for each (the options are cash, credit, external payment, and EBT card).
5. When you are ready to charge the payment, select the Charge button next to the payment row.
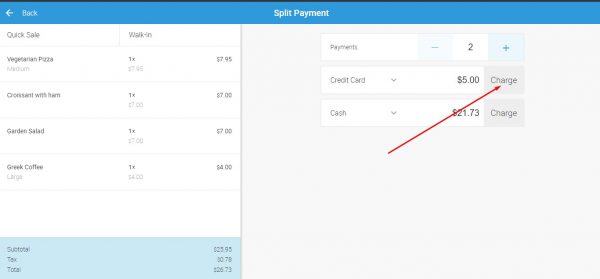
6. You will be able to process the payment through the guided screens (will depend on the specific payment method selected).
• Once successfully charged, all items from the order will be deducted from their stock quantity in order to reserve the items for this customer for once he pays the remaining order balance.
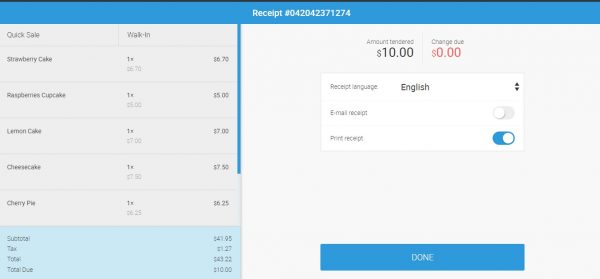
7. On the receipt screen for the payment, you can print or email the customer the receipt for their initial payment in the layaway.
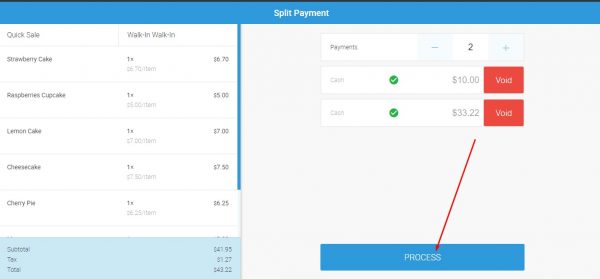
8. When the payment is processed, you will return to the Split Payment screen.
• A check mark will appear next to the payment if successfully processed row and you will have the option to Void it on this screen.
9. Now that a payment in the order was charged, select the Pay More Later button will be able to be selected to save the order so that the remaining balance can be paid in future installments.
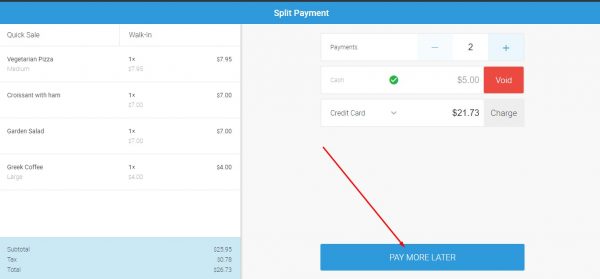
• The transaction info for this layaway will be saved and the status of the order will be “Partially Paid”.
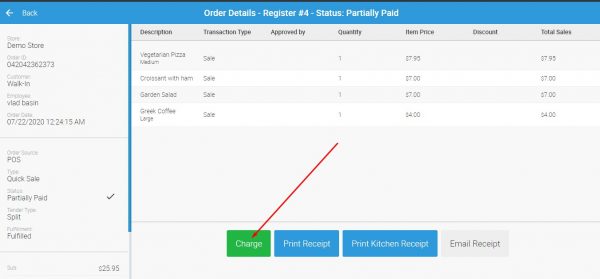
10. When the customer is ready to process another payment installment for the order, select Orders in the left navigation menu.
11. Tap the order you would like to finish processing from the Orders list. You will be moved to the Order Details screen.
12. Select the green Charge button on the bottom left.
13. You will be taken back to the Split Payment screen for the order, where you will be able to continue splitting up the order into other payment installments for the layaway or charge the remaining balance.
14. Once all payments in the order have been successfully charged, select the PROCESS button that will appear on the bottom of the screen.
15. On the Receipt screen, you will be able to print or email the receipt for the entire order.
16. You can now provide the customer with the items that were reserved from their order.
• In reporting, each payment installment will be considered a separate transaction.
How to Use Deposits in eHopper
1. Add items to the shopping cart that will be part of the order with the deposit.
2. Choose the green All Payments button and then select Split Payment as the payment method.
3. The order will be split evenly 2 ways by default. Decide how much of the order total you would like the customer to pay upfront as a deposit and then change one of the payments to that amount by tapping on the amount and then manually entering what the amount for the upfront deposit will be. The rest of the order amount will be moved to another payment in the split.
4. Select the payment type that is preferred for the upfront deposit payment by tapping the down arrow on each row and then selecting the payment option for each (the options are cash, credit, external payment, and EBT card).
5. When you are ready to charge the payment, select the Charge button next to the payment row.
6. You will be able to process the payment through the guided screens (will depend on the specific payment method selected).
• Once the deposit is successfully charged, all items from the order will be deducted from their stock quantity in order to reserve the items for this customer once he pays the remaining balance.
7. On the receipt screen for the payment, you can print or email the customer the receipt for their upfront deposit payment.
8. When the payment is processed, you will return to the Split Payment screen.
• A check mark will appear next to the deposit payment if successfully processed row and you will have the option to Void it on this screen.
9. Now that a payment in the order was charged, select the Pay More Later button to save the order so that the remaining balance can be paid at a later date.
• The transaction info for this deposit will be saved in the Order Details and the status of the order will be “Partially Paid”.
10. When you are ready to charge the customer the remaining balance for the order, select Orders in the left navigation menu.
11. Tap the saved order that there was a down payment on from the Orders list. You will be moved to the Order Details screen.
12. Select the green Charge button on the bottom left.
13. You will be taken back to the Split Payment screen for the order, where you will be able to charge the rest of the balance that is not yet paid (or continue splitting up the order so can charge at a later time).
14. Once all payments in the order have been successfully charged, select the PROCESS button that appears on the bottom of the screen.
15. On the Receipt screen, you will be able to print or email the receipt for the entire order.
• In eHopper reporting, both the deposit and any later payments in the order will be considered separate transactions.
How to Send Quotes/Invoices in eHopper
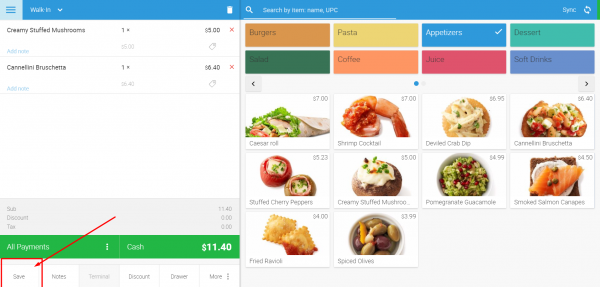
1. Add the items or services the customer is interested in purchasing to the shopping cart by selecting a category, followed by the product in the category.
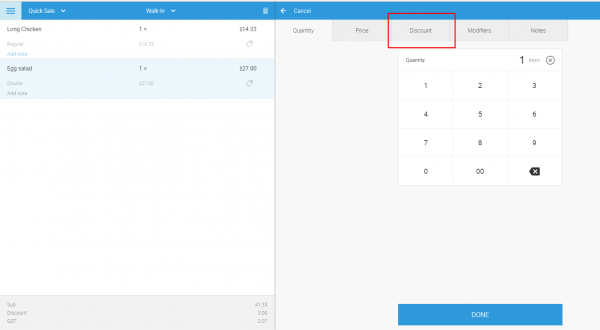
2. Tap an item in the shopping cart to provide a discount, adjust the quantity or price for the invoice. You can also add a custom note or message that will appear on the invoice for the customer to see, once sent over to them.
3. Add or remove a tax to the invoice.
4. Tap the Save button on the bottom of the screen.
5. On the Save Order screen, you can optionally enter an Order Name for purposes of easily identifying the order at a later date (if the customer ends up wanting to pay the invoice for example).
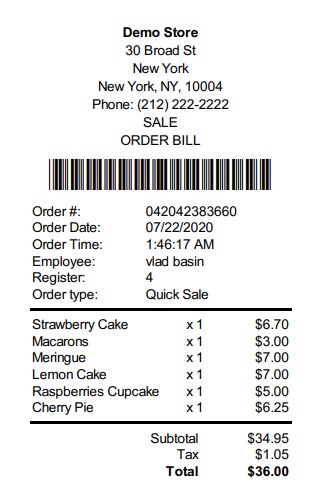
6. Choose Print bill to print the invoice and/or Email bill to email the invoice to the customer by selecting the switch to the right of the option. The switch will appear blue when selected.
7. Click Save Order button to save the order and print or email the invoice to the customer (in the form of a receipt).
8. If the customer ends up wanting to pay the invoice, simply select Orders from the left menu and then search for and select the order with the invoice.
9. Click on the Open button on the bottom of the Order Details screen.
10. You can then add items or adjust the order or choose to process it as is. When you are ready to charge the customer, select the preferred payment method and process the payment.
Conclusion
As demonstrated in this guide, with eHopper point of sale, you can use the Pay More Later and Save features to perform such actions as layaways, deposits, and sending invoices/quotes to customers.
The great thing about using eHopper for these functions is it provides your customers with more options and control of how they will pay for your products and services, which will likely make them more inclined to buy from you, providing you with more sales and revenue as a result.
Get started with eHopper today to take advantage of these features, among a suite of others that will bring you the growth and profits you are hoping for.