How to Create a Contactless Ordering Experience at Your Restaurant in 2022
Creating a contactless ordering experience for guests at your restaurant is now more important than ever, in order for your business to stay competitive and keep up revenue.
Even before Covid-19 swept the world, the restaurant industry was adjusting to consumer preferences and behavior, moving towards the modern and more efficient virtual ordering experience.
This trend has only been accelerated with the onset of the Covid-19 pandemic, as consumers are looking for the safest options to place orders and pay for their meals, so they can maintain the least contact with others as possible.
What is Meant by Contactless Ordering?
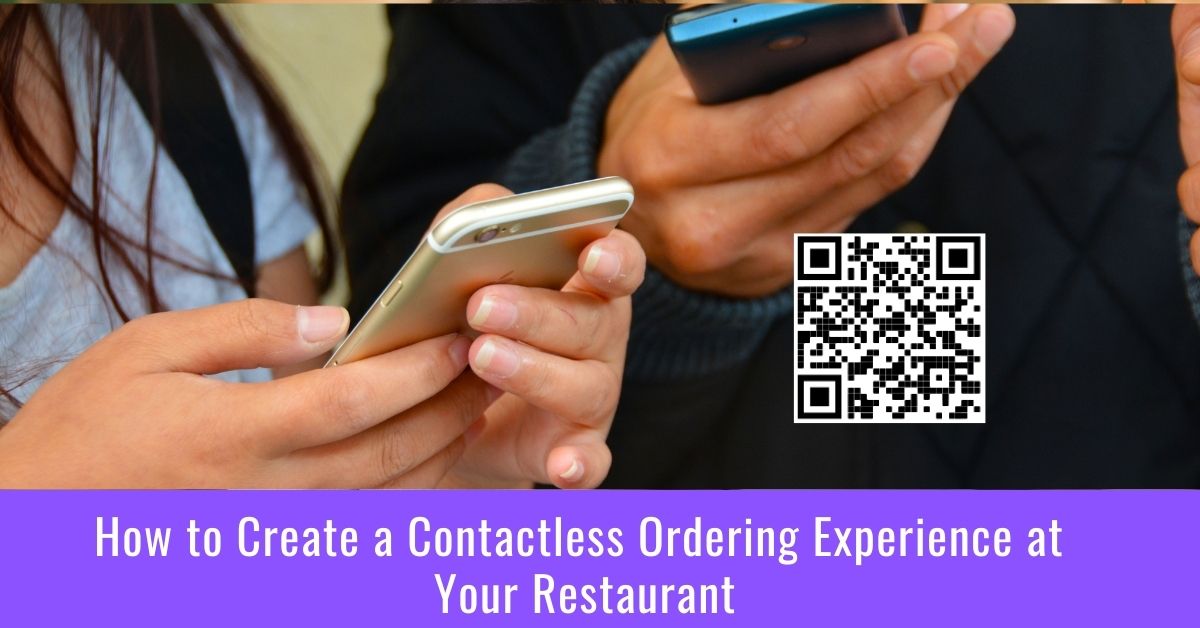
Contactless ordering is when customers are able to place their order and even pay without needing to be in proximity with other customers or restaurant staff, through the use of their mobile devices.
All the customer has to do is scan a QR Code that is displayed at their table or at your storefront, from their phone, instantly taking them to your digital menu. From there, the customer places their order and then enters their credit card data to pay.
The kitchen staff will then receive the new order, prepare it, and either deliver it to the customer’s table or call out their order number for the customer to pick up.
With this ordering method, it eliminates the need for customers to wait in lines, place their order in front of servers, or use physical menus shared between guests.
In this guide, we will review how to set up a contactless ordering and payment experience at your restaurant. The steps are the following:
1. Create Digital Menu with an Online Ordering System
2. Create and Display QR Code at Your Restaurant
3. Customer Scans QR Code and Submits Order from Phone
4. Order Sent to Kitchen and Prepared by Staff
5. Food Order Sent to or Picked Up by Customer
1. Create Digital Menu with an Online Ordering System
The first step to create a contactless ordering experience for your restaurant customers is to create a digital menu that they can access from their mobile devices.
The most ideal way to do this is by using an online ordering system, such as eHopper, that synchronizes all data between the online menu and orders placed in-person via the point of sale.
This way, all your ordering and sales data will be in one centralized location, without the need of comparing and analyzing data within multiple systems.
To create a digital menu in eHopper, please follow the steps below:
1. Create an eHopper account on the OmniChannel package or install the eCommerce app.
2. Log in to the eHopper Back Office at and create your products. This can either be done manually by following the steps here or by uploading all product data at once through a .CSV file. During both methods, you are able to specify which products you would like to sell via the digital menu.
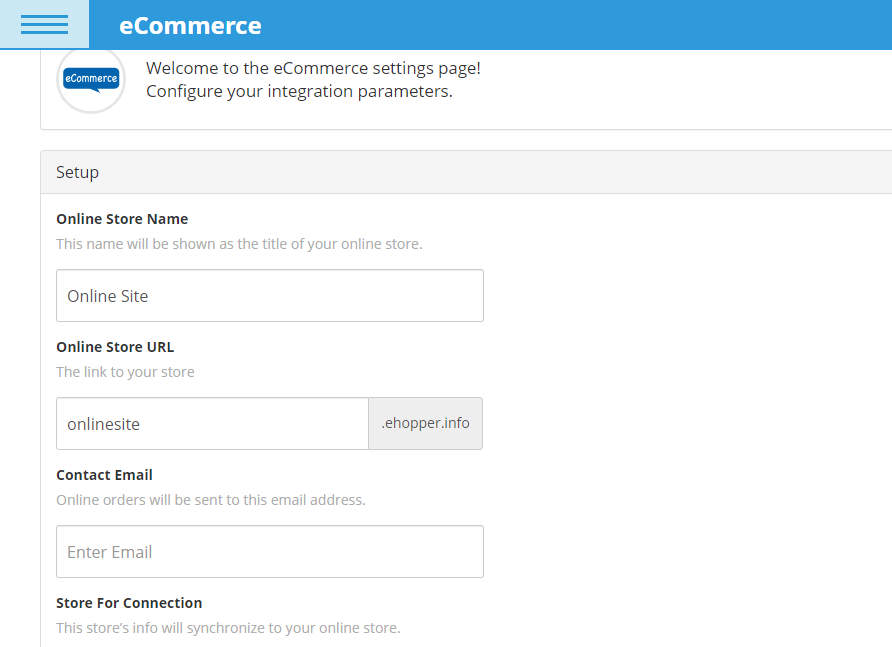
3. Next, you will create your virtual site. To do so, first go to Apps—>eCommerce in the left navigation menu.
4. In the Setup section, enter the store name you would like displayed on the site, as well as it’s URL, and the email address that you would like new online order notifications to be sent to, in the various fields.
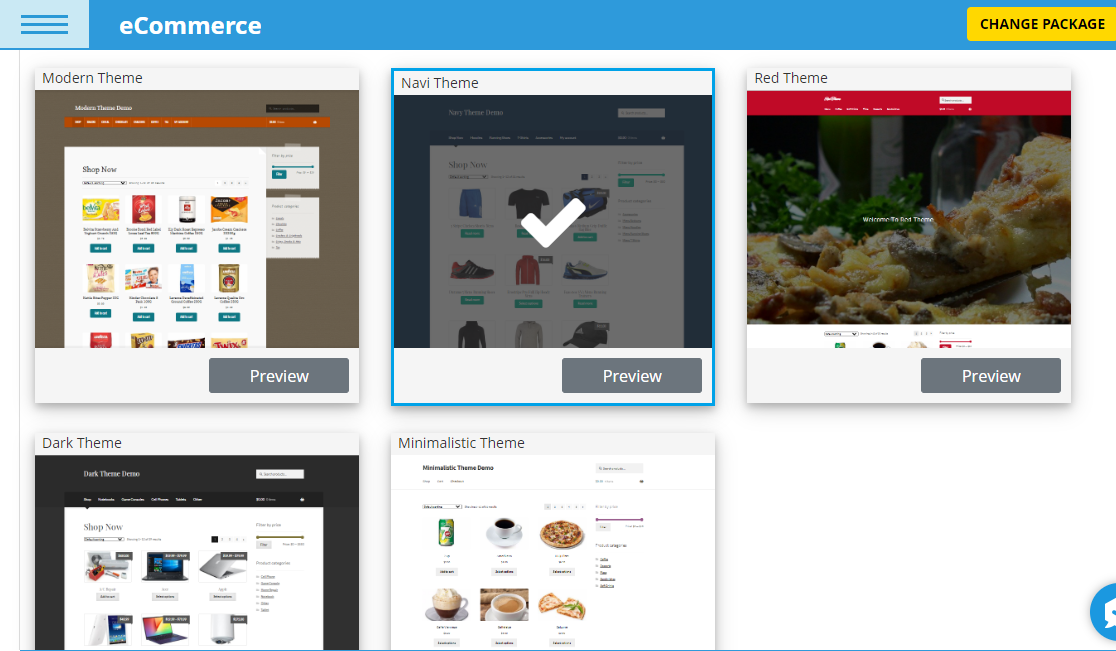
5. In the Theme Settings section, choose from the different color theme options for your digital menu and then click the SAVE button.
6. From there, your online site creation will be in progress, and this process will take approximately 10 minutes. In that time, you can leave the screen and perform other operations within eHopper.
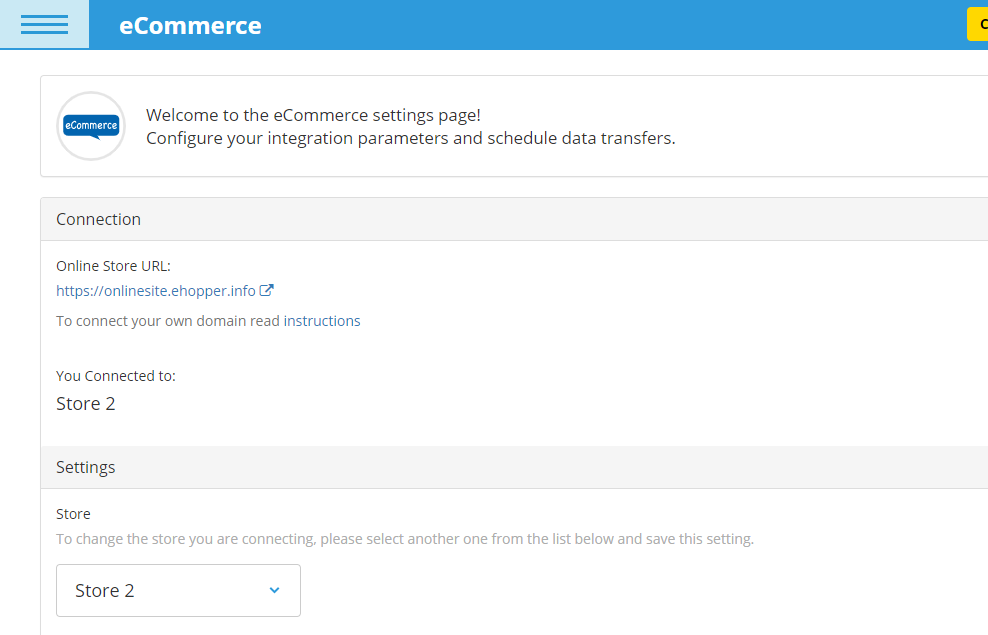
7. Once your site is created, you will receive an email. Return to the eCommerce section and select the POS store you would like your digital menu to share data with.
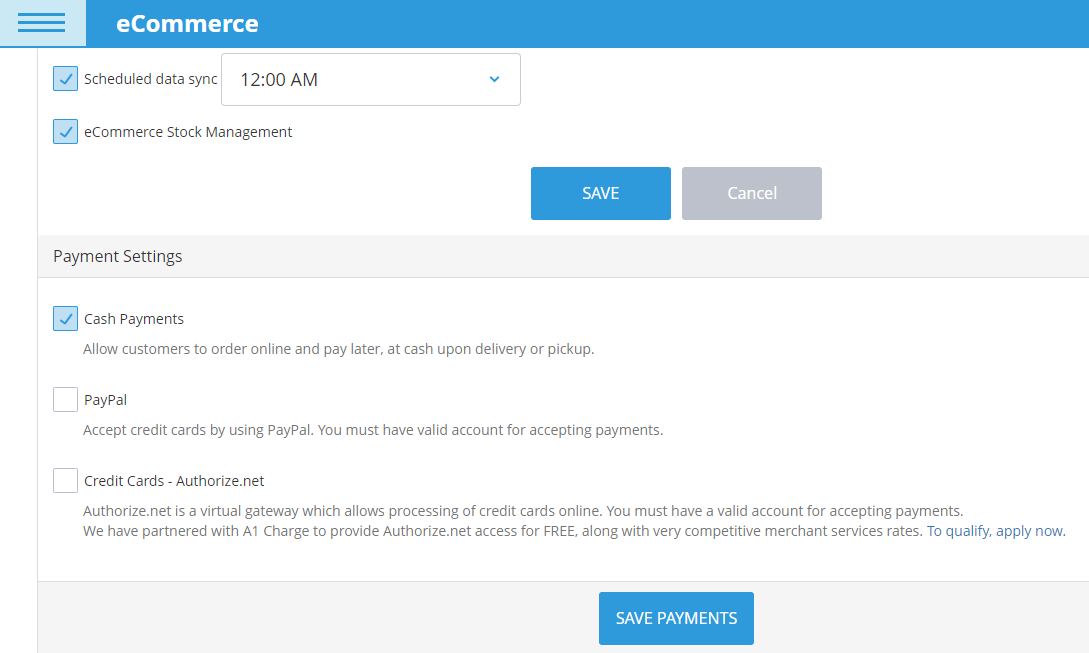
8. Next, set up your payment options for the online menu.
One option is to enable cash payments by allowing your customers to order virtually from their mobile device and then pay in cash at the counter.
You can also enable credit card payments via PayPal (with a PayPal account), and/or via Authorize.net (with an Authorize.net account – if you do not have one, contact your merchant service provider).
Once you are done selecting your payment options, hit the SAVE PAYMENTS button.
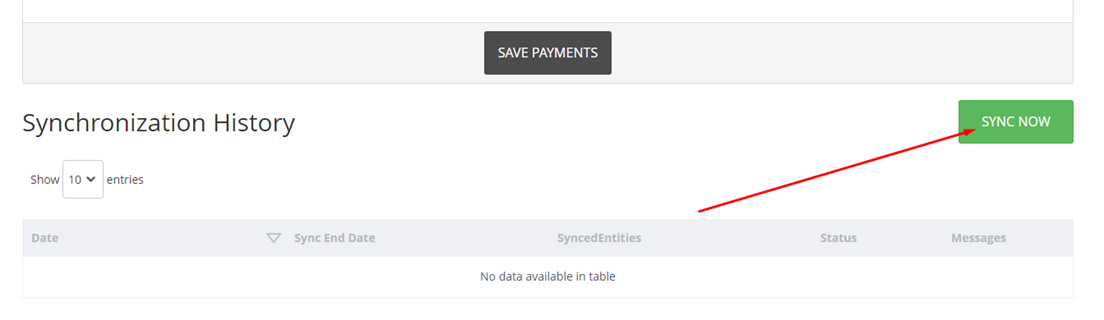
9. Finally, select the SYNC NOW button to synchronize inventory data from the point of sale store to your online site, so that all your restaurant menu items will be available digitally for purchase.
Note: The synchronization may take a few minutes.
2. Create and Display QR Code at Your Restaurant
Now that your online site is created, the next step is to generate a QR Code for your digital menu. This can be done easily via various free QR Code generator sites, such as https://business.ehopper.com/free-restaurant-menu-qr-code-sign-generator/
Once the QR code is created, you will be able to save it as an image file and print it out.
Finally, you can display the printed QR Code anywhere within your restaurant where guests will be able to scan, such as on a sign outside or at the entrance, on the wall, or directly on your customers’ tables.
3. Customer Scans Code and Submits Order from Phone
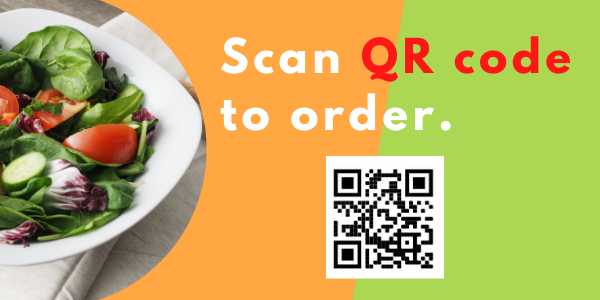
Once the QR code is displayed at the restaurant, all your guests have to do take out their mobile devices and either use their iPhone camera or any free QR Code app from their phone to scan the QR code.
Once scanned, your guests will be taken directly to your digital menu, where they can select menu items to add to their virtual shopping cart.
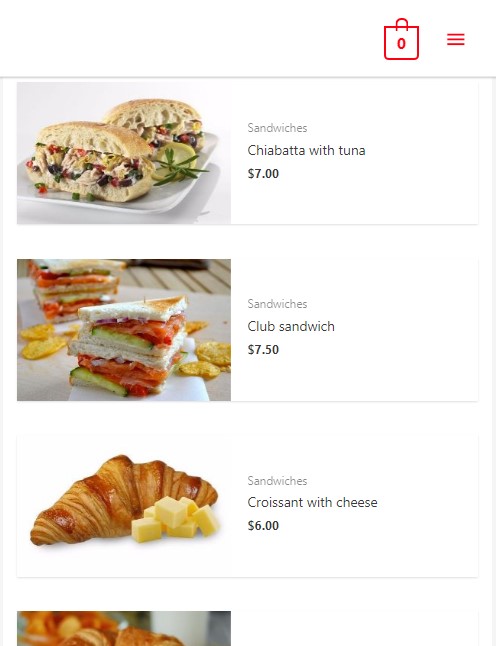
Next, they will be able to submit their order, and either enter their credit card information to pay while placing the order on their phones or choose to pay at a later time at the restaurant counter (depending on the settings you set for your site within eHopper).
As an example, scan the QR code below from your phone to see a demo of a digital menu, similar to one you can provide to your customers.
4. Order Sent to Kitchen and Prepared by Staff
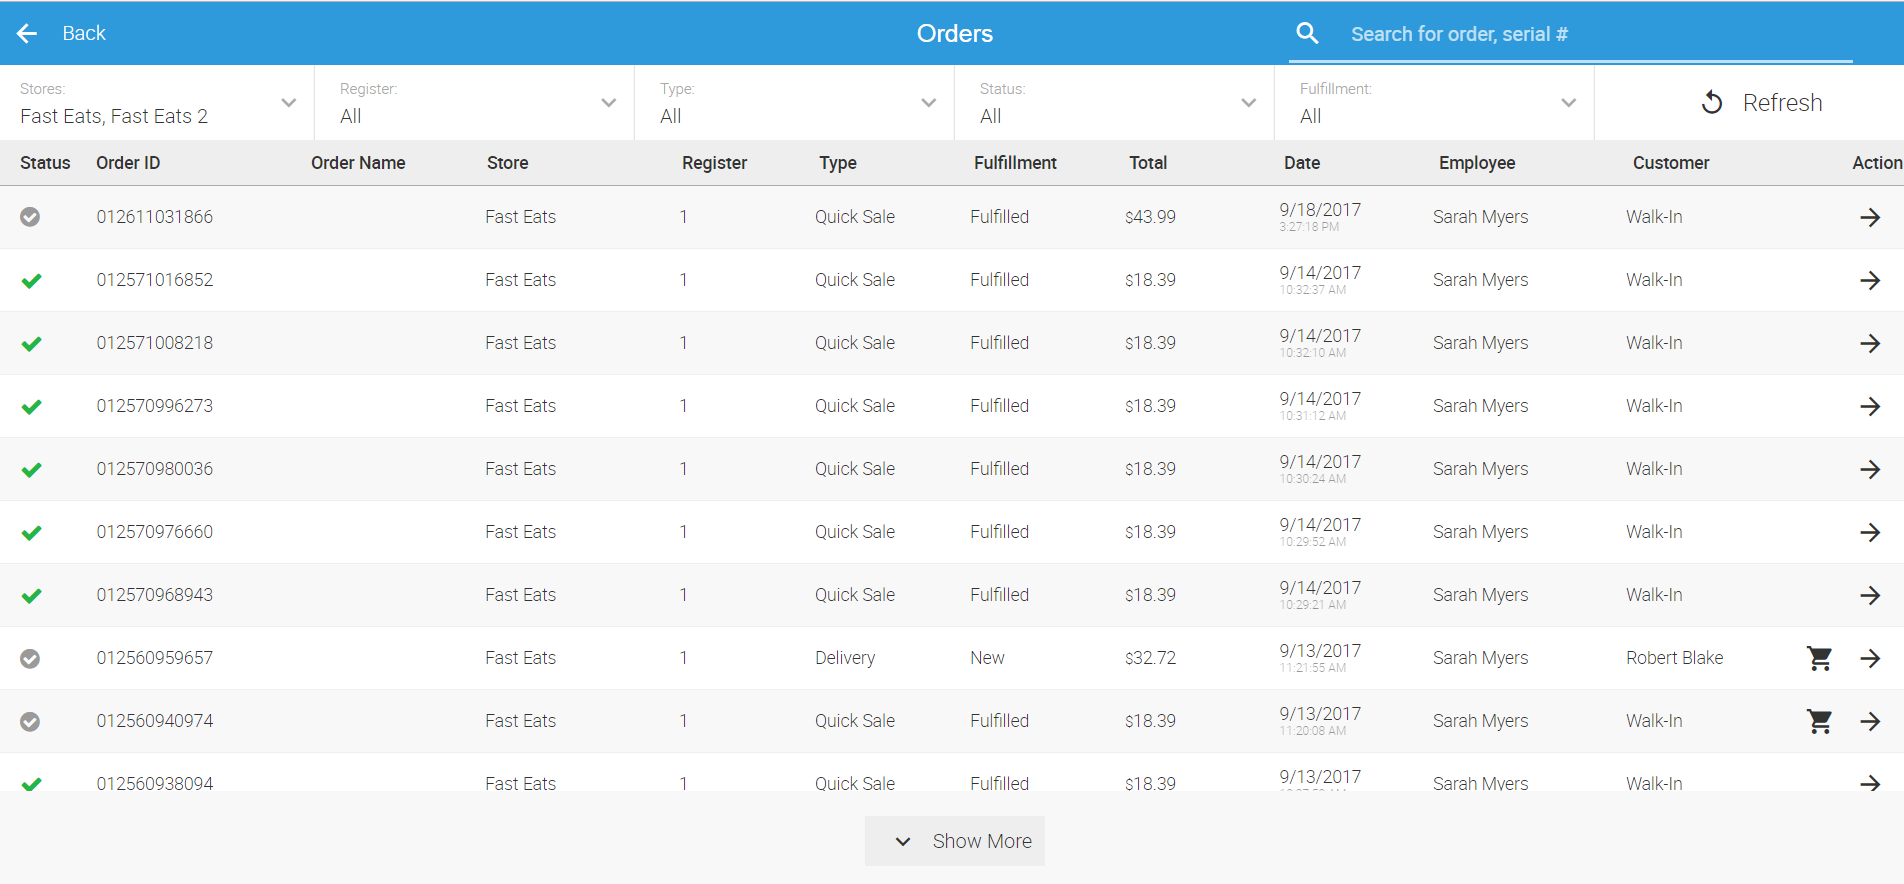
Once a customer submits an order from their phone, you will receive an email with all the order details and will be informed about it through a popup on your POS screen.
The order details will also be displayed in the Orders section of your POS, and can be re-accessed and opened from there.
In addition, if you have one or more kitchen receipt printers, and have kitchen receipt printing set up in your eHopper account, online orders will be instantly sent to the kitchen printer(s) as soon as they are placed by restaurant guests.
This allows the kitchen staff to begin preparing orders as soon as they come in, simplifying and speeding up the order process and the customer experience.
5. Food Order Sent to or Picked Up by Customer
Finally, once a guest’s food order has been prepared by the kitchen staff, they can proceed to deliver it the customer directly at their table or call out the order for the customer to pick up on their own.
All in all, with this contactless ordering experience, your restaurant guests will be able to receive their food safer, quicker, and more efficiently than if they were ordering in-person.
Benefits of a Contactless Ordering Experience
There are various benefits of having a contactless ordering experience for guests at your restaurant.
1) Safer Customer Experience
Your customers will feel a lot safer and more at ease about ordering and making payments through a contactless menu, allowing you to remain more competitive and keep up sales during this difficult time.
No longer will guests need to stand in close proximity to other customers in line or have wait staff stand by their table to take their order. They also will not have to worry about handing their credit card over for payment or using a physical menu, touched by countless others.
2) Increase Speed and Efficiency of Ordering Process
With customers ordering and paying on their own, through their mobile devices, they no longer will have to wait around for the wait staff to come by their table. This will allow customers to order at the pace they would like, so they could get their food and pay faster, improving their overall experience.
It will also free up your staff to focus on other matters. In addition, it makes it less likely that human error will occur for your staff than if they were to manually take down guests’ orders directly at the table.
3. Stay Competitive with a Modern Ordering Experience
Another benefit of using a digital menu at your restaurant is that it provides your customers with a modern, unique, and more enjoyable ordering experience, allowing you to increase customer engagement and stand out from your competition.
The restaurant industry is trending in this direction so it is a good idea to stay ahead of the pack, before other restaurants get on board.
4) Save Money
By using a digital menu for your restaurant, with guests ordering from their phones, you will save money by no longer having to print out physical menus.
In addition, since the contactless ordering experience allows for less chance of mistakes made in the ordering process, it will be less likely you will lose money by having to toss out food made in error.
Finally, since you will rely less on wait staff to take customer orders, you can potentially cut costs on payroll as well.
Conclusion and Next Steps
As seen from above, moving towards a contactless ordering experience at your restaurant is critical now, with the major shift in consumer expectations and behavior, especially following Covid-19.
With the eHopper OmniChannel package, you can quickly and easily make this contactless experience a reality for your guests. In addition, you will be able to have all order and sales data, from both in-person and digital sales, in one location, for easy access and more efficient operations.
Get started today with a digital menu and contactless ordering experience at your restaurant, with the eHopper OmniChannel package.
![How To Leverage eHopper POS Licenses to Grow Your Restaurant or Retail Business [Guide]](https://ehopper.com/wp-content/uploads/how-leverage-ehopper-pos-licenses-180x180.png "How To Leverage eHopper POS Licenses to Grow Your Restaurant or Retail Business [Guide]")

![How to Choose the Best POS System for Restaurants and Retail [Download FREE POS Comparison Checklist]](https://ehopper.com/wp-content/uploads/free-pos-comparison-checklist-for-best-post-180x180.jpg "How to Choose the Best POS System for Restaurants and Retail [Download FREE POS Comparison Checklist]")