
How to Create Contactless Menu for Restaurants with QR Code
Technology was already moving the restaurant industry towards virtual, contactless ordering, but with the huge impact of the Covid-19 pandemic, this is now critical in order to remain competitive.
Consumers are now very cautious when ordering from restaurants and will only do so if they feel they can maintain distance from other guests and staff, as well as refrain from touching any surfaces that are often touched by others, such as physical menus. This is unlikely to change once the pandemic is over.
A great way to keep your customers comfortable with ordering from your restaurant and have them more likely to come back is by having a digital menu that customers can order from directly from their phone, simply by scanning a QR code. Another great thing about this is it will allow you to save money on printing costs, as you will no longer need physical menus.
Below are the steps to create a contactless menu for your restaurant with a QR Code.
1) Create site and contactless menu
2) Generate and Display QR Code for Site
3) View and Prepare Customer Orders
What is a QR Code?
Before we get to the steps to set up a digital menu through QR Code, let’s review what exactly a QR code is.
A QR Code is a two-dimensional barcode that can encode over 4000 characters and can be used to display specific text or open a URL for a user, after scanning it with their phone.
For users to scan the QR code on their phone, they can install any QR code scanning software, of which there are many free apps available. A QR code can be displayed on a website for scanning or can be printed and displayed at any location. QR Codes can be easily created and exported via any QR code generator site.

1) Create Site and Contactless Menu
Before you can set up a contactless menu through QR Codes, the first step is to create a website, where your menu can be displayed.
This can be done either when you sign up with the eHopper OmniChannel package or after installing the eCommerce app in your eHopper account.
Once installed, follow the below steps to create your site and build your contactless menu:
1. In the Back Office left navigation menu, go to Inventory –> Products and then select a product you would like to sell online.
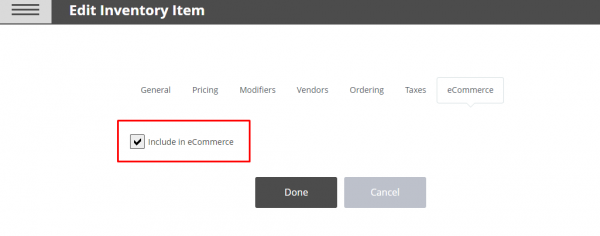
2. Go to the eCommerce tab and select the Include in eCommerce checkbox.
3. Repeat steps 1-2 for every product you would like to sell online.
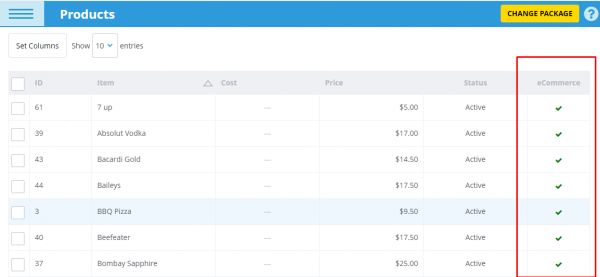
Note: You can view all products that were enabled to be sold online by logging in to Back Office and selecting Inventory—>Products in the left menu. There is an eCommerce column on that page. Each product that has the Include in eCommerce checkbox selected will have a green check mark in that field.
4. Go to Apps—>eCommerce in the Back Office left navigation menu. In the Setup section, input the name you would like displayed as the title of your online store in the Online Store Name field.
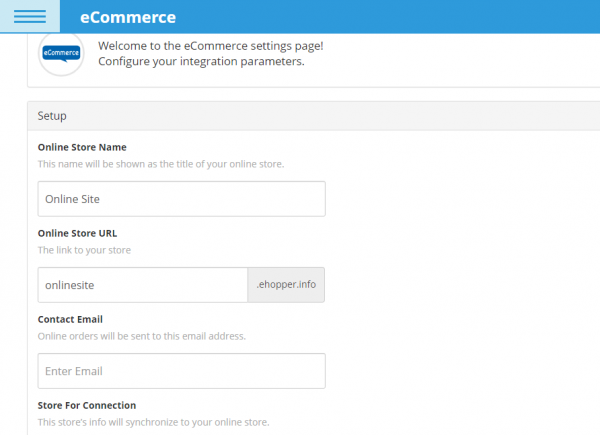
5. In the Online Store URL field, enter the URL you would like to use for your online store (the domain will be ehopper.info).
6. Enter the email address that you would like to be notified about online orders in the Contact Email field.
7. In the Store for Connection drop-down field, select the active store whose info you would like to synchronize to your online store.
8. In the Theme Settings section, select the color scheme that you would like to use for your store from the available options. Once you have selected a color scheme, hit the SAVE button.
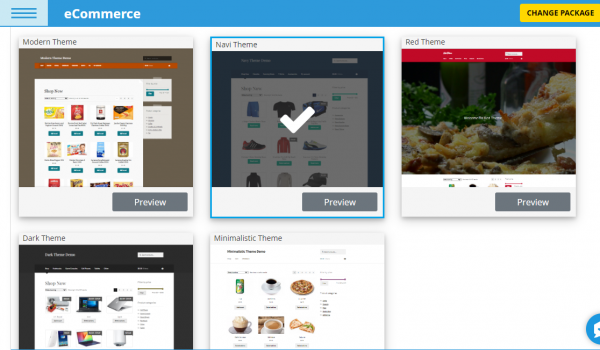
• You can also Preview the theme, which will open in a new browser tab.
9. A Confirmation popup will appear. Select the Yes option if you would like to be notified once your site is created via a push notification.
• You will be taken to a Thank you screen, which will be displayed until the online site has been created. This process will take about 10 minutes. In that time, you can leave the screen and perform other operations within eHopper. When you return, everything will still be in progress and nothing will be lost.
• In the event that an error occurs, you will receive an error message, where you will have the option to try again.
• If you allowed the push notifications, you will receive a notification once the site is completed. You will also receive an email informing you of this.
10. Once the site is complete, return back to the eCommerce settings screen. In the Connection section, the URL of your site will be displayed. Select it to view the site (products will appear once synced).
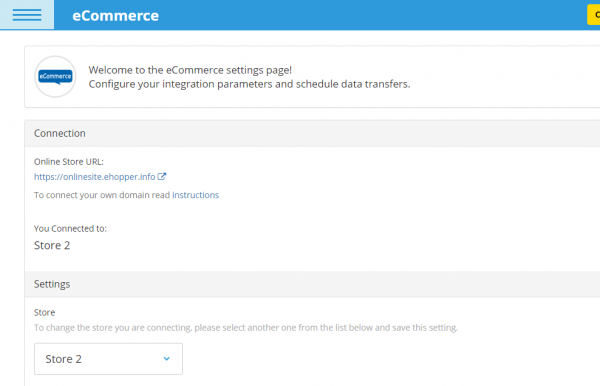
11. Select the Store from the drop-down that you would like to sync data from to the online store.
12. In the Data Transfer section, you can optionally choose to schedule a daily time that your data will sync to your online store by selecting the Schedule data sync checkbox and then choosing a time from the drop-down.
13. Also under Data Transfer, you can also optionally select the eCommerce Stock Management checkbox to make the quantity of each of your products visible on the online store.
14. Select the SAVE button to save the settings from steps 11-13.
15. In the Payment Settings section, select the Cash Payments checkbox if you would like to your customers to have the option of ordering online and paying later, through cash upon delivery or pickup.
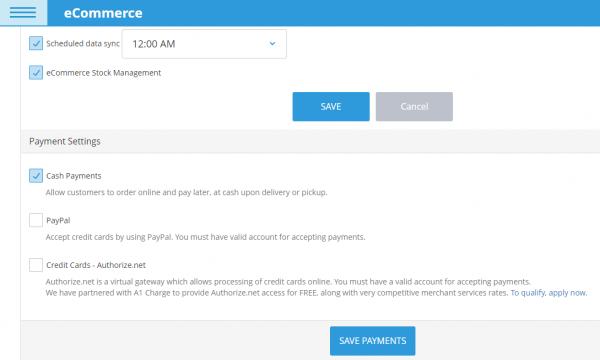
16. Select the Credit Cards – Authorize.net checkbox if you would like customers to have the option of paying online via credit card, through the Authorize.net gateway.
In order to use Authorize.net, you will need to have/create an account. Contact your merchant service provider to find out if you have one, if they can create one for you.
• eHopper has partnered with A1 Charge, a merchant service company, to provide access to the Authorize.net gateway for FREE, along with very competitive merchant services rates.
17. If you selected the Credit Cards – Authorize.net checkbox, additional fields will appear. Follow the instructions provided under each field to acquire each of the API Login ID, Transaction Key, and Client Public Key within your Authorize.net account and enter them in their respective fields.
18. If you would like customers to have the option to pay online through PayPal, select the PayPal checkbox. Then enter the email associated with your PayPal account in the PayPal Email field, as well as the PayPal API Username, API Password, and API Signature (these can be found by following the directions provided under each field within your PayPal account).
19. Once you have finished providing the Payment Settings info, select the SAVE PAYMENTS button.
20. Select the SYNC NOW button to synchronize the inventory data from the selected store to your online site.
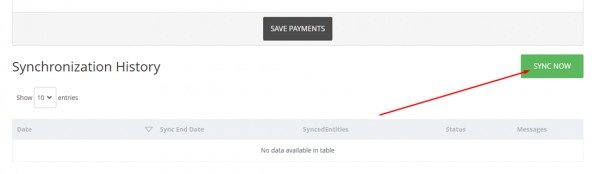
21. The synchronization may take a few minutes. Once complete, your digital menu will be displayed on your site.
2) Generate and Display QR Code for Site
There are many free QR Code generator sites you can use to quickly and easily create a QR code for your online site (https://www.the-qrcode-generator.com/ for example).
All you have to do is enter your site’s URL and select to generate the code! Once the QR code is created, you will be able to save it as an image file and print it out.
Then, you can display the printed QR Code anywhere you would like customers to scan it. If you have a drive-thru for example, you can display it on a large sign outside your restaurant, so customers can scan it as they pass by in their car.
Another option is to have the QR code displayed near the restaurant entrance or even at each customer’s table.
Customers will be able to scan the QR Code via their iPhone camera or any free QR code app on their phone.
Once scanned, it will take them instantly to your contactless menu on their phone, where they can choose food items to add to a virtual shopping cart.
Depending on how you set up your site, the customer can then either place the order from their phone and pay at the cash register or both, place the order and pay via credit card, directly from their phone.
Scan the QR code below to see the demo on your phone.

3) View and Prepare Customer Orders
Once a customer places an order from the digital menu on their phone, you will be informed about it in 2 ways:
1) Through a notification popup on your eHopper POS screen
2) In an email that contains all info about the order (it will go to the email address specified when creating the site in the eHopper Back Office).
The order will also appear in your Order list in both the POS and Back Office, from where it can be accessed, reviewed, reopened and processed (if not yet paid), or even voided or refunded.
If you have kitchen printing set up, you can even have the order instantly print to your kitchen printer(s) as soon as the order is placed online, so that your kitchen staff will be informed about the order in real time and can begin preparing the food at a fast pace.
This all equates to a seamless, safe, and enjoyable ordering experience for your guests and staff.
Conclusion and Next Steps
As seen from this guide, it should be a no brainer nowadays to create a contactless menu for your restaurant with QR Codes.
The benefits are the following:
1) By allowing for a contactless experience, your customers will feel safe and comfortable ordering from your restaurant. This is a must in today’s landscape in order for your restaurant to survive.
2) It is more likely to improve customer satisfaction and staff morale by providing a seamless, modern, and enjoyable ordering experience.
3) You will save money on printing costs, as guests can now view a virtual menu and order from their phones, instead of needing a physical menu.
4) Your menu items will be more likely to attract attention on your digital menu with dynamic product images.
5) You will be able to easily change your menu options with just a few clicks (instead of having to reprint a physical menu each time).
This is all possible with eHopper online ordering. Sign up today to get started with a contactless menu fast!